Friday, October 1, 2010

Flipped Out

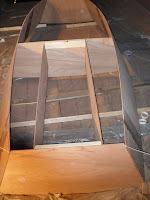
We flipped the boat the other day. I had enough hands to flip it right side up the other day, and so we got it turned over. I have the first layer of tape on all the chines, bow and transom now, and a second layer on the bow and transom. I'm hoping to be able to get the bulkheads in soon.


Overall, we have a boat shape and I think it's fair. It was exciting when it was flipped because I hadn't seen a major change in a long time...not since I put the bottom on. No real visual changes since then and now it will be interesting to see them happen more quickly.

Sunday, August 8, 2010

There's a hole in the bottom of my boat


I faced my fears today and cut the hold for the dagger board trunk. I kind of did it on a whim because I had some time and it was too hot to work with the epoxy.

It was actually very easy and it APPEARS to have come out well. The trunk ws already in place, held by screws from when I used the bulkheads to bend the sides and make the shell of the boat. So I just went underneath the boat, drew a pencil line down each side of the bottom of the trunk, and also traced the sides along the bulkheads. Then I took the trunk out and used my trusty little 3.5" saw to plunge a cut on the lines using the laser guide. I wasn't able to complete the cuts with the saw, so I drilled a hole in the cutout and used a jig saw to finish the ends.


This is what the cuts I did from the inside...looked like from the outside. It wasn't all that fun doing the cuts laying under the saw, but it seemed to be the easiest way at the time.


The slot was a little bit too tight, so I used a dremel with a sanding drum on it to take down the sides of the cutout till the trunk slid in.


I did extend the trunk so it would go all the way through the bottom of the boat. I just felt like it would give me a better easier seal.


Once I slid the trunk through the hole, the lines I had drawn on the bulkheads make it fast and easy to realign the trunk.

Taping the seams

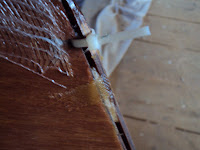
I did all of the spot welds with the woven tape and it held perfectly while I cut the zip ties and put the one piece seams over them. I went over the edges of the spot welds with the grinder so they wouldn't cause air bubbles under the long seams.


I've been doing the overlapping layers of biaxial tape on the outside seams. It's been really hot, over 90 degrees for much of the summer, so when I do the work, it's at night, and I still have to work fast because the barn holds the heat.
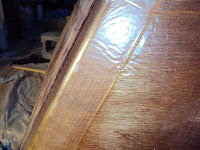
I have done two layers on all but two of the outside seams. I used poly tarp mat
erial "poor man's peel ply" on the second layer of tape and it worked fairly well. There are some creases to sand from where the poly sheet was folded in the packaging.


I had to grind out some air bubbles from the first layer of tape, but overall it has worked out well.


The corners don't seem to be that high relative to everything else.


Wednesday, April 14, 2010

Boats to Build and Re-Build


At this point I've probably rebuilt the framing 5-7 times trying to get the boat straight. It goes in fine any way you want to put it in, but I'm finding if it's not done just so...the bottom won't align, and then you can't make it align unless you redo the framing. I've also rebuilt the dagger trunk because I think I misinterpreted the plans. there was a place where it looks like the rear insert ends above the bottom of the trunk and as I was assembling it seemed like that would be impossible to seal.


If you look at some of the pictures you can see the old vs new. I also extended it 12mm so the whole trunk could go through the bottom of the boat.


The big problem with getting it aligned came from the dagger trunk. Since it's just one piece it is much easier to misalign. So I ended up cutting a piece of strapping to the same length and using that to help square it. That and a speed square.


There was also a time when I noticed the seat sides had pulled away from the transom. The top (or bottom) was still touching, but the rest had pulled away by at least 3-4" so that threw everything off...


I hope it's all set now. My diagonal measurements are exactly the same

Thursday, April 1, 2010

Do it and do it again -

I've come a long way and it's exciting to see a boat shape. It's also exciting that pieces seem to be fitting...I've found an error here and there, but they've been small so far. I cut one side of one of the molds 10mm too wide, so I think I'll trim it down, and I shorted the dagger board by about 10cm.


The rear seat sides were in, and the first bulkhead. I used sections of 20" wide 2x4 to space the seat sides.


I'm finding Gorilla Tape more and more useful for holding things in place.

I had been getting frustrated because the bulkheads that were supposed to fit as frames were not fitting very well. When I put one in and then another, it would pull the first one out of whack. I was starting to doubt my measurements, or my understanding of how this whole thing was supposed to be done. Then I decided I must not have it "supported on blocks" to accept the curve of the hull well enough.


Well when I moved it, everything came undone. But I managed to avoid being the grown man that cries and got it up on some blocks. This seemed to allow for the rocker in the design to come out and things seem to be falling into place now. It also gave me new and better ways to hold the frames in place.


Tonight I glued the cleats to the forward seat sides, and glued the last side of the dagger board trunk on to the other previously assembled pieces.


I hope that thing doesn't leak...
I keep finding it somewhat difficult to envision where everthing goes and how with the boat upside down, but it seems to be working out ok.

Monday, March 22, 2010

Make a Boat Shape - Going 3D

Tonight I went from two dimensional sheets of plywood to three dimensional boat. Em came out and helped me move the bottom out of the way that I had splice together, and then helped me get my two side pieces into position. I think it's safe to say that the whole process outlined below would go easier with two people. I stacked my side pieces to drill the holes for the transom and the bow stiching. I used zip ties for the stiches. I had these extremely long zip ties, and I was kind of irritated I couldn't find my huge bin of smaller zip ties. But I think the longer ties gave me some flexibility especially with the transom.

So basically I stacked the two side pieces which are about 21 feet long. I was very happy with the symmetry of the two pieces. They were as identical as someone as impatient and at times lacking attention to detail as I do can hope for so I drilled my holes.


Then I stiched my pieces together with my zip ties


This is where things start to get a little bit complicated if you are me. Because I'm by myself in the barn with two 21 foot long 6mm thick pieces of plywood trying to stand them up on edge and get the ends apart so I can get the transome in. It wasn't graceful. I had this image of hitting the record button on the camera and taking a video of myself transforming these flat pieces of wood into a boat in living color...but the video didn't come out, and it was probably good because I looked way more than silly battling these huge sections of wood as they tipped and bent all around completely outside my control.

So all in all I found that if I used a zip tie to connect the transom to one side and then leaned the whole thing against the table while I pushed the other side out, I could swing the transome in and thread another tie through the other side. It was touch and go while I tried to get some of the frames in, the weight of the sides never reall held them in place, so I used some small screws to hold them in place.

The frames are not quite in the right place, but I think if I get the third frame in and get another set of hands, I can start to put in the longitudinal frames and dagger board trunk next.

There are a few materials I need to get first, like a stack of 1x1/2 in pine cleats to stiffen some of the longidudinal frames. It will be interesting if nothing else.

At least now it looks (kind of) like a boat even if it's upside down.

Sunday, March 21, 2010

The Splice

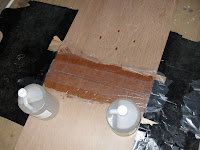
I've made good progress lately. We've had a few very warm days for March. Yesterday was in the range of 75 degrees. So I got out the fiberglass and epoxy and tried to make good use of the weather. The fiberglass joints seem very week until you get both sides done. I found flipping the long side pieces over to be difficult by myself. In the end it seemed the best way to do it is to kind of splint the joint with extra plywood and a couple clamps to give it some extra stiffness while I flipped. I have the dagger box 2/3 done and now the temperature is down in the 40's so I'm done with the epoxy for now....have the kerosene heater on on the barn.